So, I have to say, that while I knew that this was going to require a lot of sewing (a task I have not willingly participated in since Middle School Home Economics) I did not expect the actually action of sewing to be so difficult. If there is one lesson I learned in the creation of this journal is that I need to either make the holes bigger or the threading material thinner. The reason for this is that you pass though each hole three times. This made for highly comedic moments where I was coaxing the needle though, speaking to it like it was a shy animal.
So these were the materials that I used for this project.
So these were the materials that I used for this project.
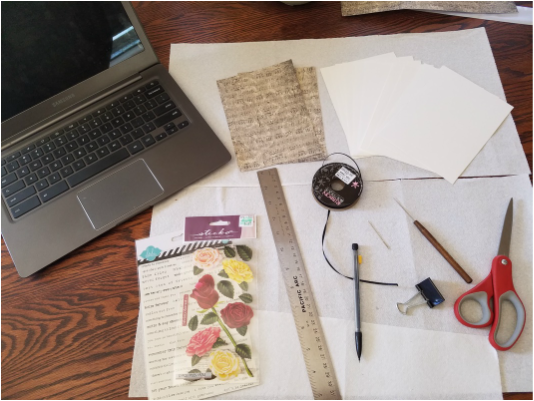
2 5X7 cover pages (scrap booking paper cut down to size)
10 5X7 filler pages (regular construction paper cut down to size)
1 metal ruler
1/8 inch black satin ribbon
1 13 gauge needle
1 binding awl
1 binder clip
Pencil
Sissors
Paper towel
Computer for back up research
Stickers for decorating the front cover
I started with measuring the paper, and cutting it out, here's my rough draft.
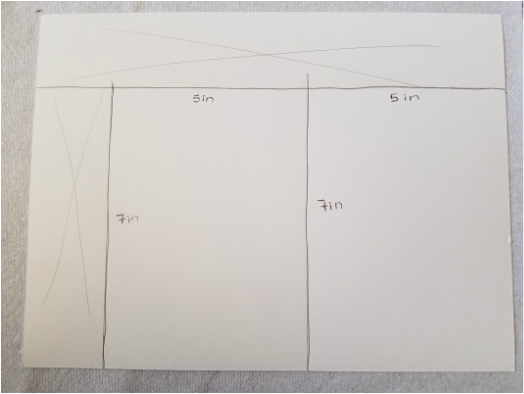
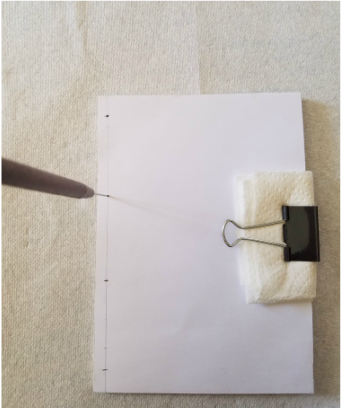
I turned the covers inside out, so I could do some measuring and marking with pencil. I am measuring out the locations of the sewing stations, this is just the fancy way of saying the holes for sewing.
I measured 1/4 inch in from the seam (you need at least 1/8 of an inch, but I wanted the binding to be highly visible) and placed stations 1 and 4 1/2 inch from the head and the tail of the book respectively. Hopefully, a picture will help.
I measured 1/4 inch in from the seam (you need at least 1/8 of an inch, but I wanted the binding to be highly visible) and placed stations 1 and 4 1/2 inch from the head and the tail of the book respectively. Hopefully, a picture will help.
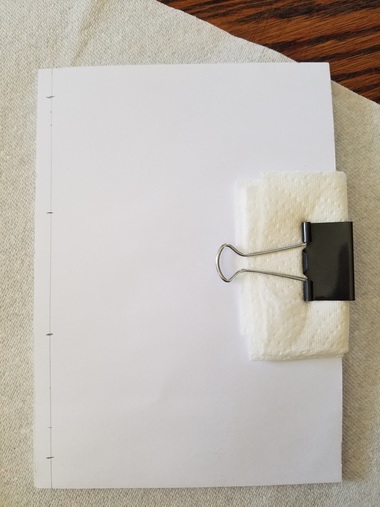
If you'll notice, I have also bound the pages together using the binder clip and a paper towel, this is so that the papers wont become dented from the pressure of the binder clip.
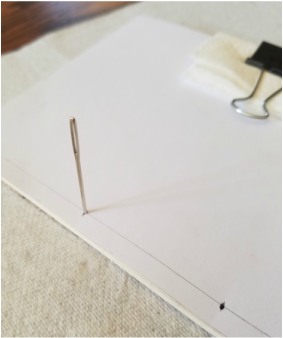
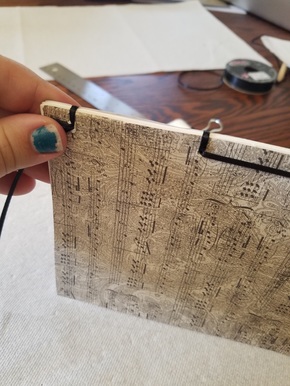
Then I grab the binding awl (which, let's be honest here, is the tool that will most likely cause me injury) and begin stabbing the four holes that the four sewing stations. I noticed that the holes seems a little small, so I grabbed by needle and pushed that through the holes a couple of times to expand it more. Little did I know, I needed to make those holes even bigger.
Then I grab the binding awl (which, let's be honest here, is the tool that will most likely cause me injury) and begin stabbing the four holes that the four sewing stations. I noticed that the holes seems a little small, so I grabbed by needle and pushed that through the holes a couple of times to expand it more. Little did I know, I needed to make those holes even bigger.
 |  |
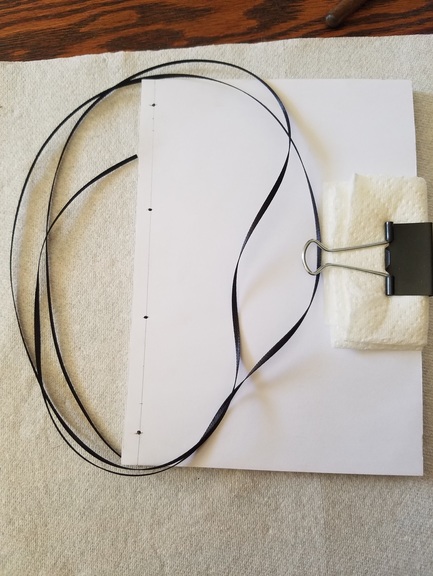
Then I measured out my ribbon. The length of ribbon that I cut was 5 times the length of my book. In Japanese stab binding it is OK to have extra thread, because you'll just cut it off at the end.
I decided not the have a knot a the end of my ribbon to hold it on the needle because that would add to the width of the material that I had to pull through the hole.
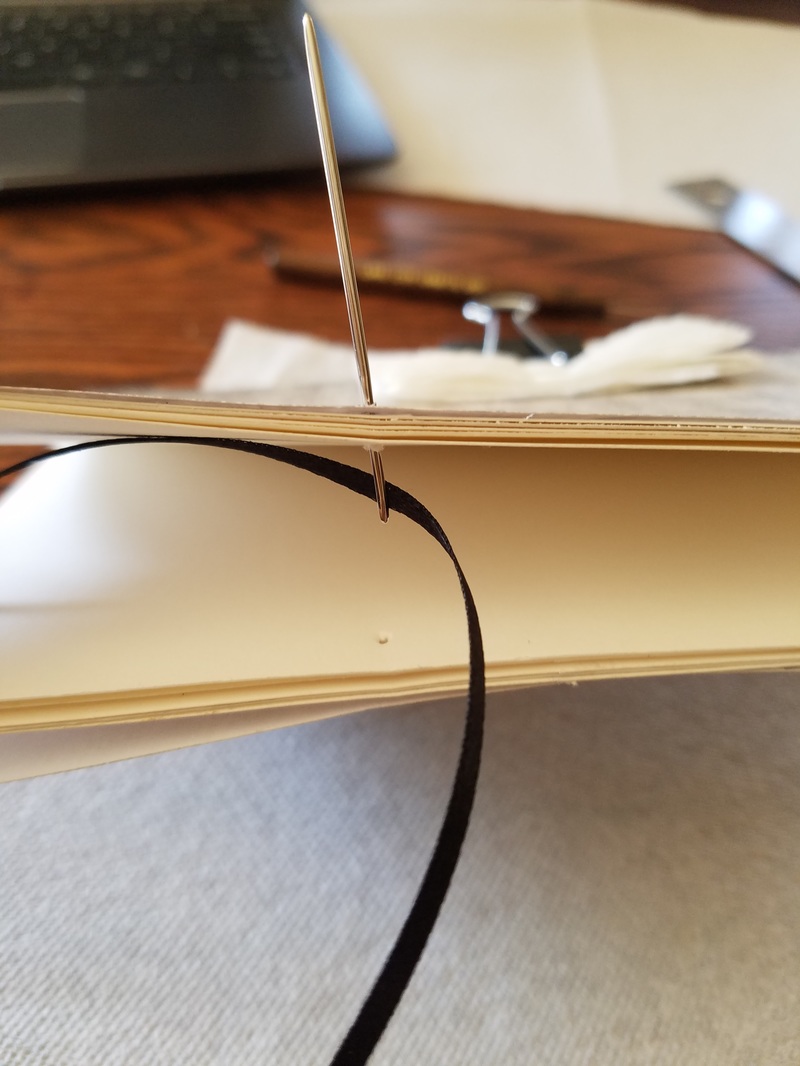
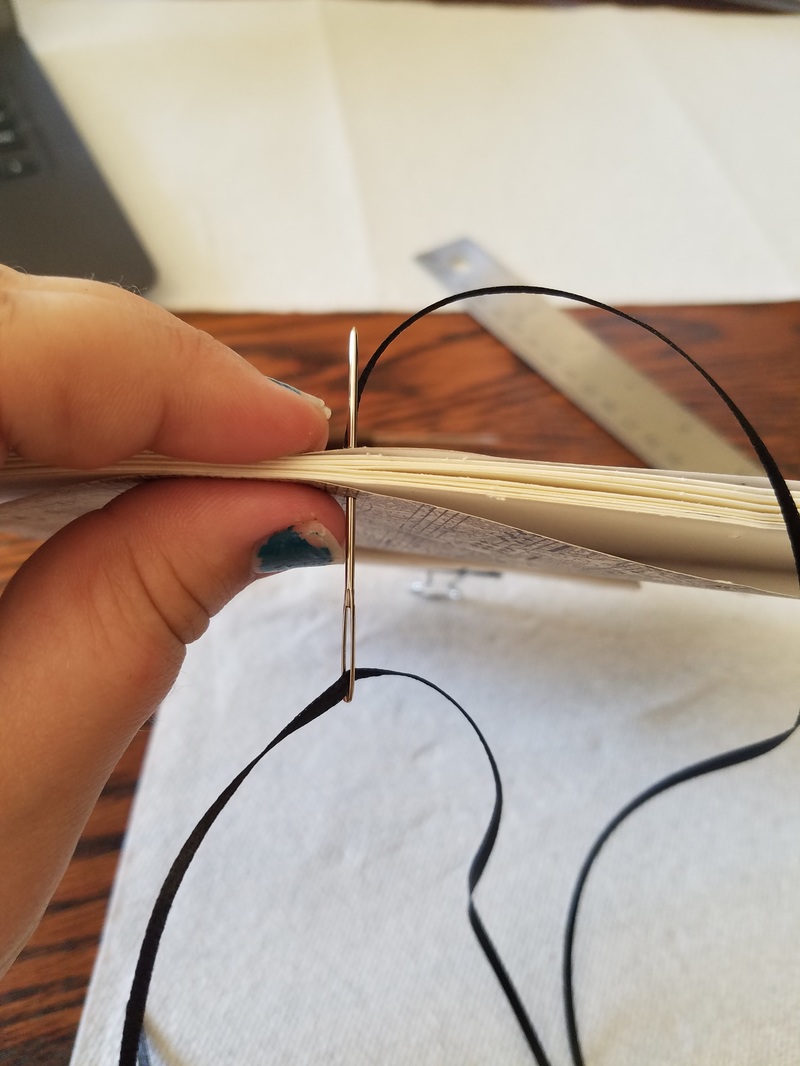
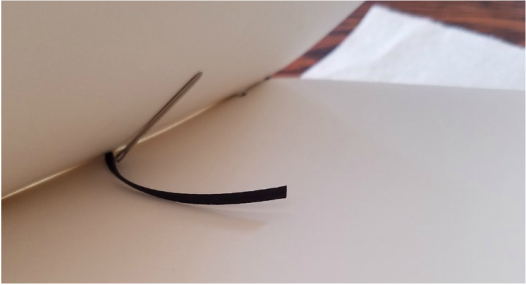
You begin sewing on the second station, from the middle ,moving your needle upwards (picture on the left). Leave about 4 inches not pulled through, and tuck it into the book facing away from the seam. We will come back to this "tail" when we are ready to tie the knot. Then wrap the ribbon around the seam and go back through the whole hole to create the seam stitch (picture on the right).
You begin sewing on the second station, from the middle ,moving your needle upwards (picture on the left). Leave about 4 inches not pulled through, and tuck it into the book facing away from the seam. We will come back to this "tail" when we are ready to tie the knot. Then wrap the ribbon around the seam and go back through the whole hole to create the seam stitch (picture on the right).
 |  |
Then move to station three and push your needle from top to bottom, going back through the hole to create the second seam stitch.
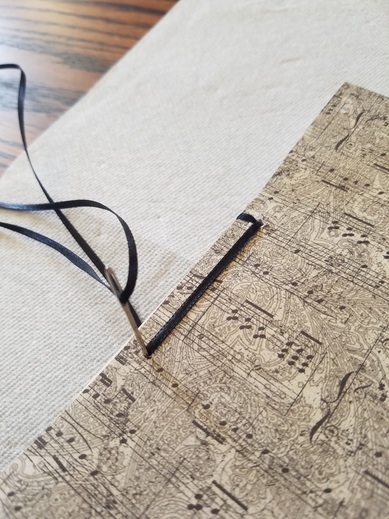
Repeat this process for the fourth station, looping through to create the seam stitch, and then a second time to create the corner stitch.
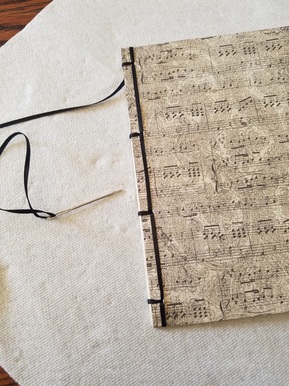
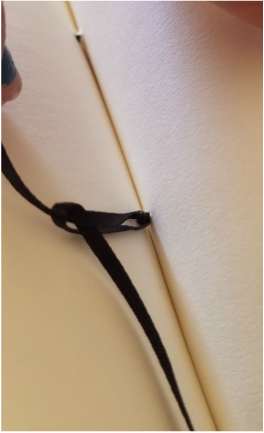
At this point you should have black ribbon on alternating sides of the book, making to look like the ribbon is weaving through the holes. Now it when you go back through all the holes, weaving as appropriate, to go back to station one. Format station one so that it is a reflection of station four, corner stitch and all. (left picture) The only un-stitched portion should be the back of station 2. (picture right)
 |  |
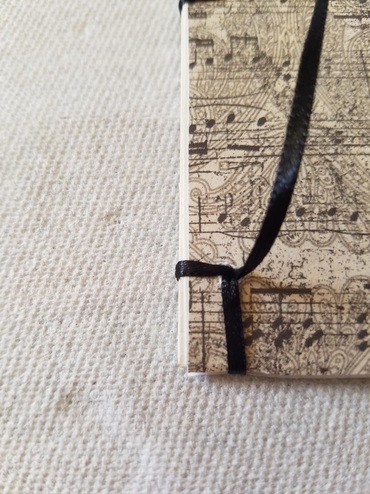
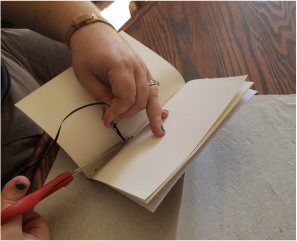
Here's the tricky part, you need to go back through station 2, but only stitch half way though, meeting back up with the 4 inch tail you left at the beginning. (top picture). Make two knots to tie off the ends, (bottom left) cut the ends so that they aren't hanging out of the book (bottom right) and there you have a book.
 |  |
Are you as confused as I was with all the sewing steps? Don't worry I used a tutorial video to help me better grasp the different steps. This particular one is called "Japanese Book Binding Tutorial: 4 hole" by Sea Lemon. The link to the video is in the uploader's name.
Some thing's I learned/questions I now have:
1) Make larger holes, or use smaller threading material.
2) How will I get a hole through a hard cover book?
3) Could I use a smaller gauge needle?
There has also been one revision to my plan, instead of doing a different binding technique next week, I am going to attempt to do this same binding with a hard cover.
As I wrap up this post, here are some of the questions I have answered so far, and revised answers for the one's I have already answered.
1. How expensive is this? - This particular project set me back $22.53, i misjudged the cost of scrap booking paper, and binding awls were hard to find.
2. Are there enough online blogs and tutorials to cover my lack of knowledge? - Sea Lemon was a particular lifesaver this week.
3. Is there a potential to hurt myself? - Yes, though I did not hurt myself with the binding awl like I thought I would, instead I hurt myself with the ribbon. I gave my hand a burn while pulling it through. Ribbon burn is a thing, I guess.
4. How quickly does book binding happen? - This book took me two and a half hours to o, that's not including shopping and research time.
5. Is there a "master" local book binder I can learn from? - Does an online "master" count? I think so.
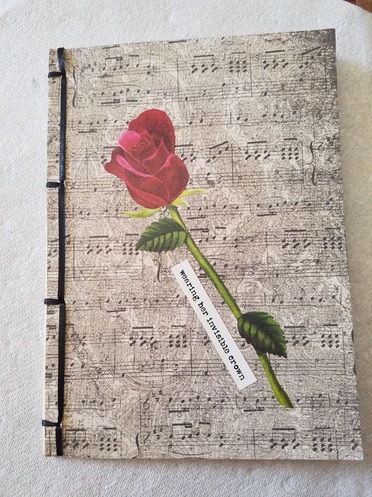
6. What am I going to create, a journal, a binding of my students work, a collection of poems that inspire me? - I plan to give this journal to a friend of mine who loves to write poems.
7. Is this more difficult the bigger the book gets? - I don't know this yet, since each practice book will get bigger, I will find this out as I go.
New Questions:
8. How can I make larger holes, can I continue to use the binding awl, or will I need to use another tool?
9. How will I get a hole through a hard cover?
10. Can I, should I, use a smaller gauge needle?
1. How expensive is this? - This particular project set me back $22.53, i misjudged the cost of scrap booking paper, and binding awls were hard to find.
2. Are there enough online blogs and tutorials to cover my lack of knowledge? - Sea Lemon was a particular lifesaver this week.
3. Is there a potential to hurt myself? - Yes, though I did not hurt myself with the binding awl like I thought I would, instead I hurt myself with the ribbon. I gave my hand a burn while pulling it through. Ribbon burn is a thing, I guess.
4. How quickly does book binding happen? - This book took me two and a half hours to o, that's not including shopping and research time.
5. Is there a "master" local book binder I can learn from? - Does an online "master" count? I think so.
6. What am I going to create, a journal, a binding of my students work, a collection of poems that inspire me? - I plan to give this journal to a friend of mine who loves to write poems.
7. Is this more difficult the bigger the book gets? - I don't know this yet, since each practice book will get bigger, I will find this out as I go.
New Questions:
8. How can I make larger holes, can I continue to use the binding awl, or will I need to use another tool?
9. How will I get a hole through a hard cover?
10. Can I, should I, use a smaller gauge needle?
