So, wallpaper is impossible to find, and since that was going to be my cover material, I had to make alternate plans. I have used scrap booking paper, which is fine, I am already familiar with this material. It just won't be as sturdy as I had originally planned. Anyways : here's a material list: 2 12X12 scrap booking pages 2 9X9 pieces of cardboard 9X9 pieces of filler paper 2 8 1/2X8 1/2 pieces of colored paper paint brush wood glue ruler X-acto knife drill pencil scissors 13 gauge needle thread binder clips paper towels As with the other books, the longest process was the cutting of the paper and other materials. If I am going to continue doing this I am going to need to invest in a paper cutting board to help save time.
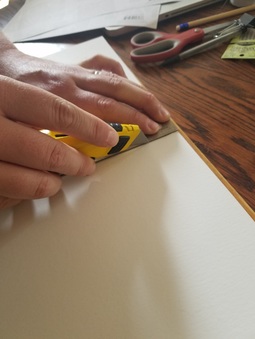
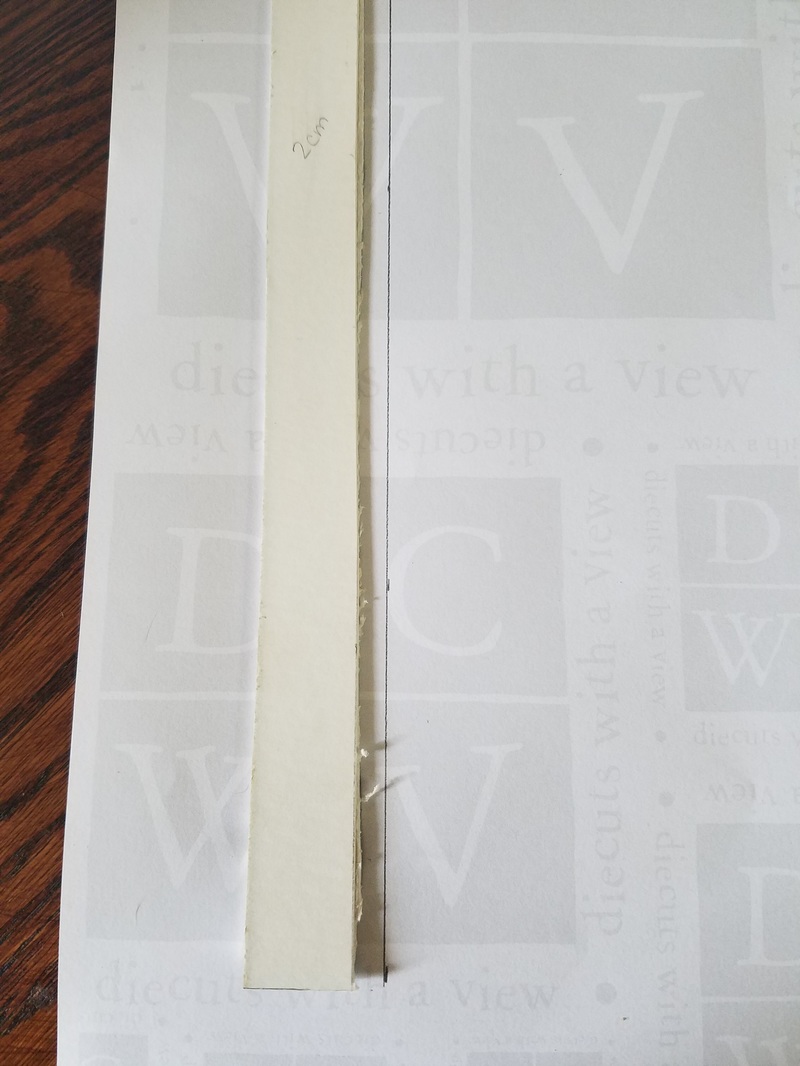
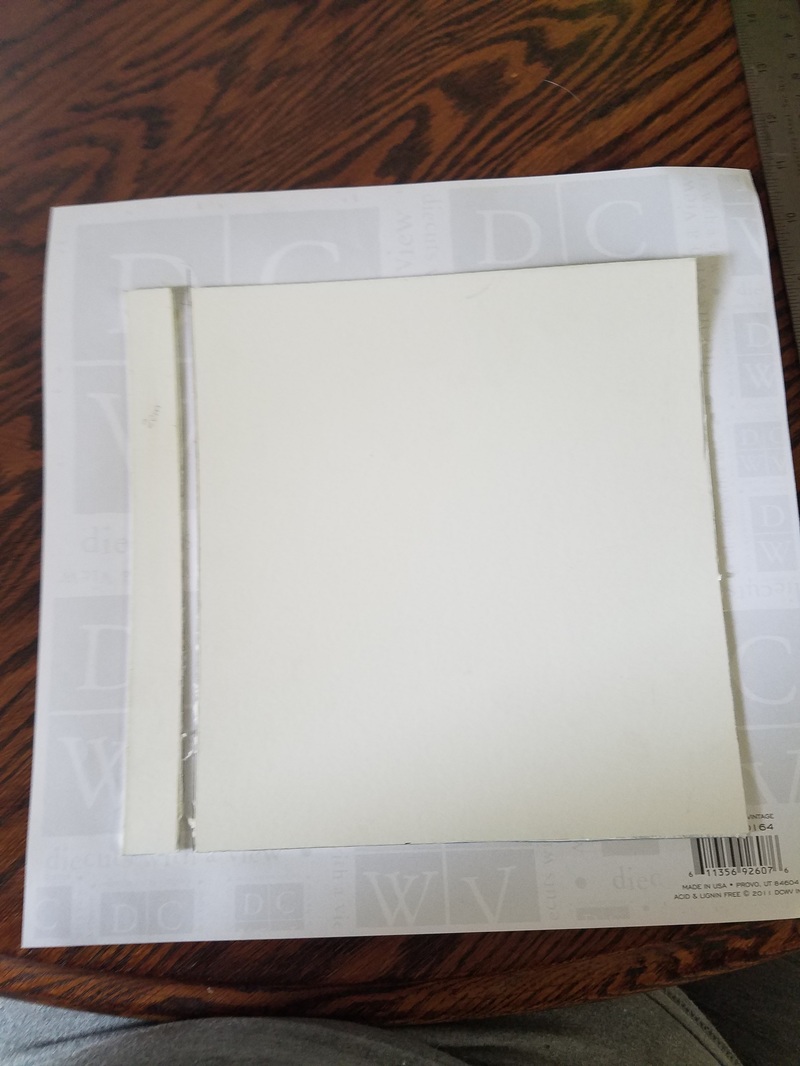
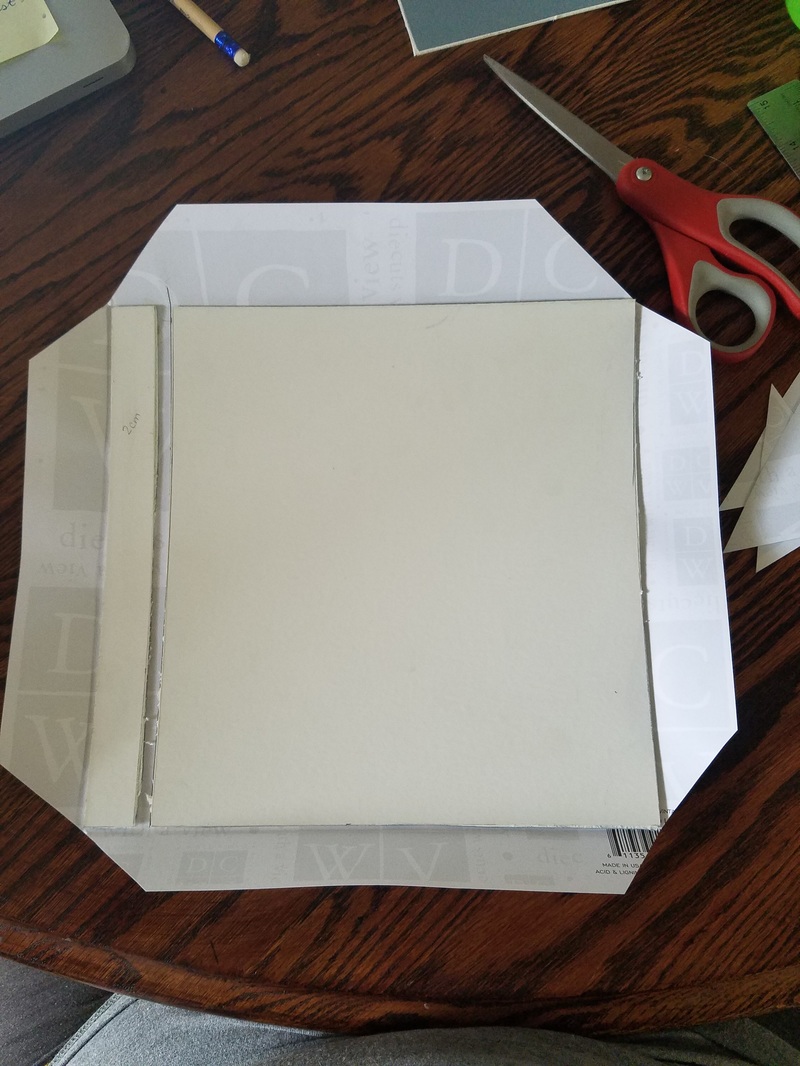
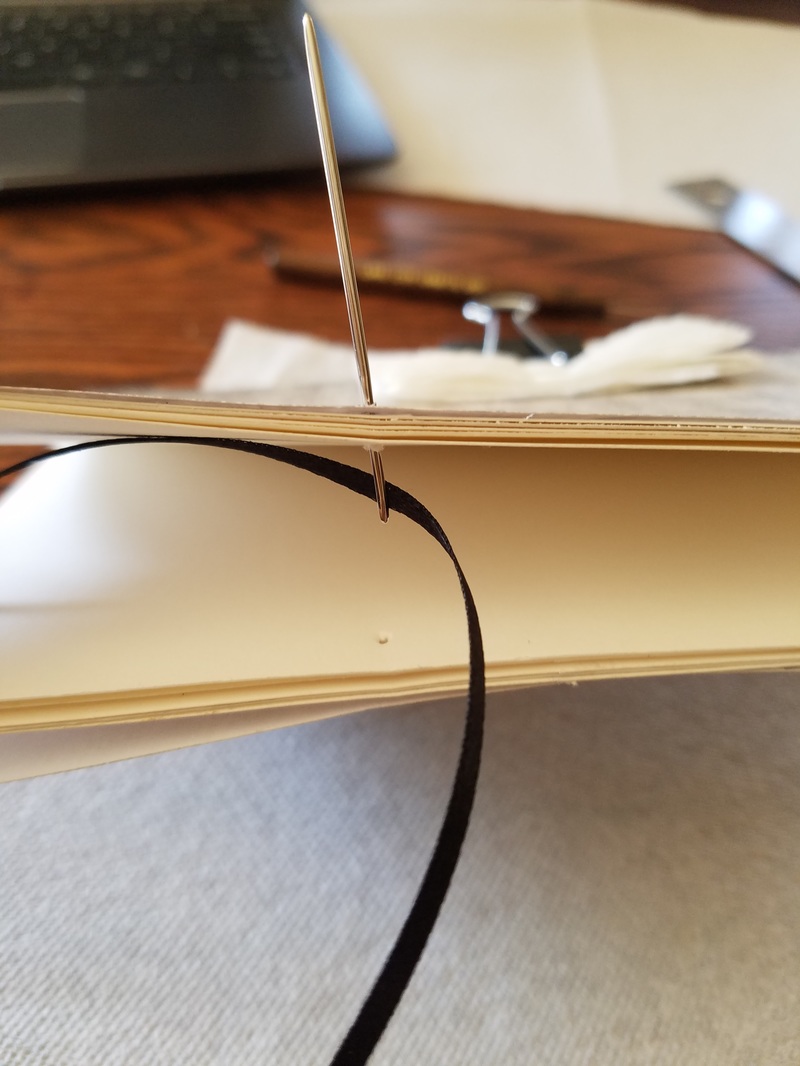
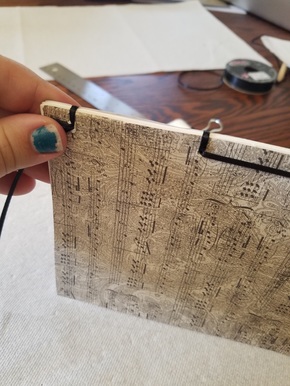
Creating the covers Step 1: Using the X-acto knife, cut 2 centimeters off of the cardboard, this will be used for the hinge. A hinge with the hardcover book is highly important, it is what allows you to actually be able to open the book. (pro tip: use the edge of the metal ruler to help you cut a straight line) See image right above. Step 2: Using the wood glue and the paintbrush, glue the 2 centimeter piece and the remaining part of the cardboard to middle of the 12X12 piece of scrap booking paper. There should be a 1/4 of an inch gap between the two piece. This is the hinge and will be the space where the holes for the binding will go. See images below.
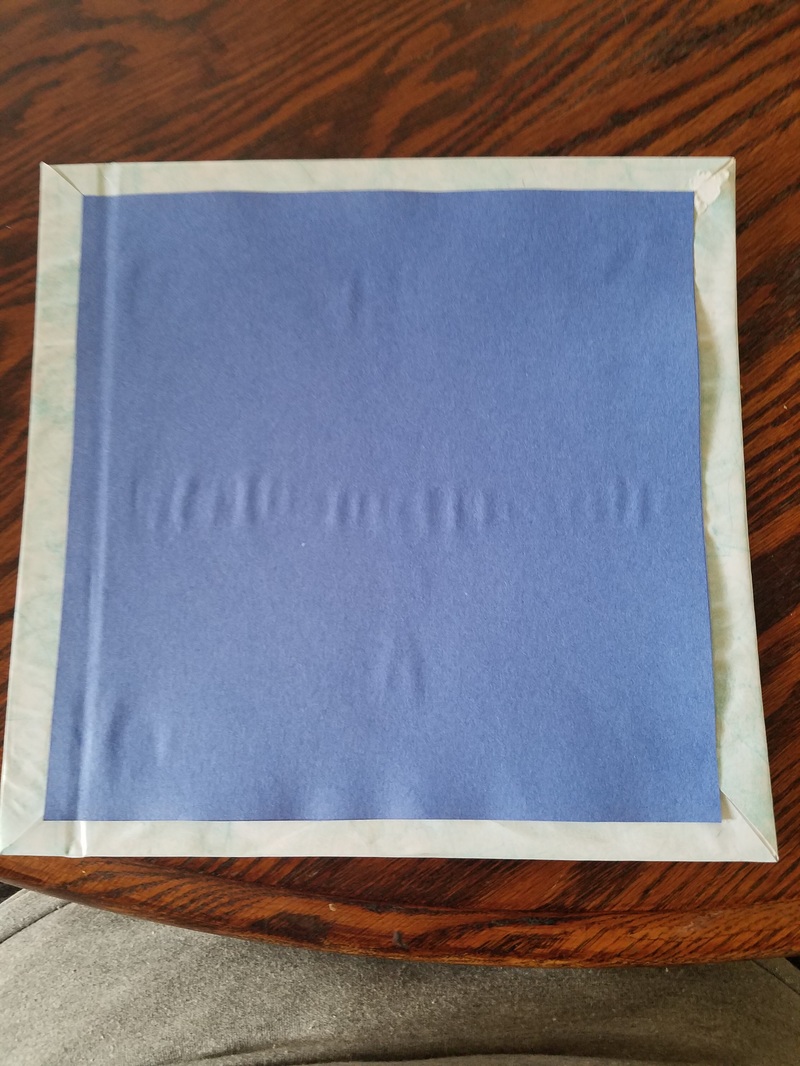
Step 3: Cut off the corners of the scrap booking paper, so that you can fold the extra paper over while making neat corners (pro tip: don't cut right next to the cardboard leave about 1/8 inch of the scrap booking paper. This will help you create neater corners) and pre-fold the paper to create a crease, so that you know where to put the glue. See image left below. Step 4: Take one of the 8 1/2X8 1/2 pieces of colored paper and, using the wood glue and paintbrush, paste it to the inside of the cover, so that it is covering up the blank space in the middle. See image right below
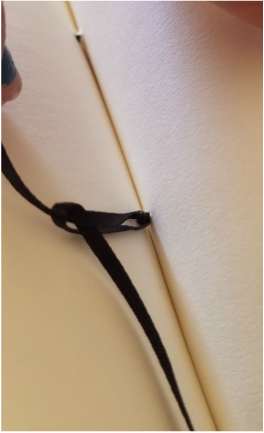
Step 5: repeat the process of the other cover Step 6: Set these covers aside to dry. I let mine rest for 24 hours, but I'm sure 3-4 hours will be fine. After the covers have dried, you can begin measuring, drilling, and binding the book in method of your choosing. For this book I decided to use the box stitch again, instead of the Hempleaf stitch. It looked neater, and was easier to keep the material tight so that the binding correct instead of loose. There was one issue that I had, wrinkling. It wasn't a problem that I was expecting to come across, but once I started opening the book there was a major wrinkle near the hinge. I'm not sure how to remedy this for future use, if it is a matter of material used (scrap booking paper instead of something sturdier, like wallpaper) or if it is a matter of not enough drying time 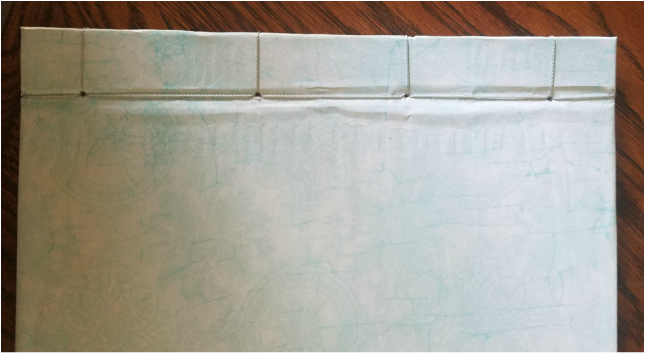 However, I like the look of this book over all, and I think it might be a tradition I continue with for my classes.
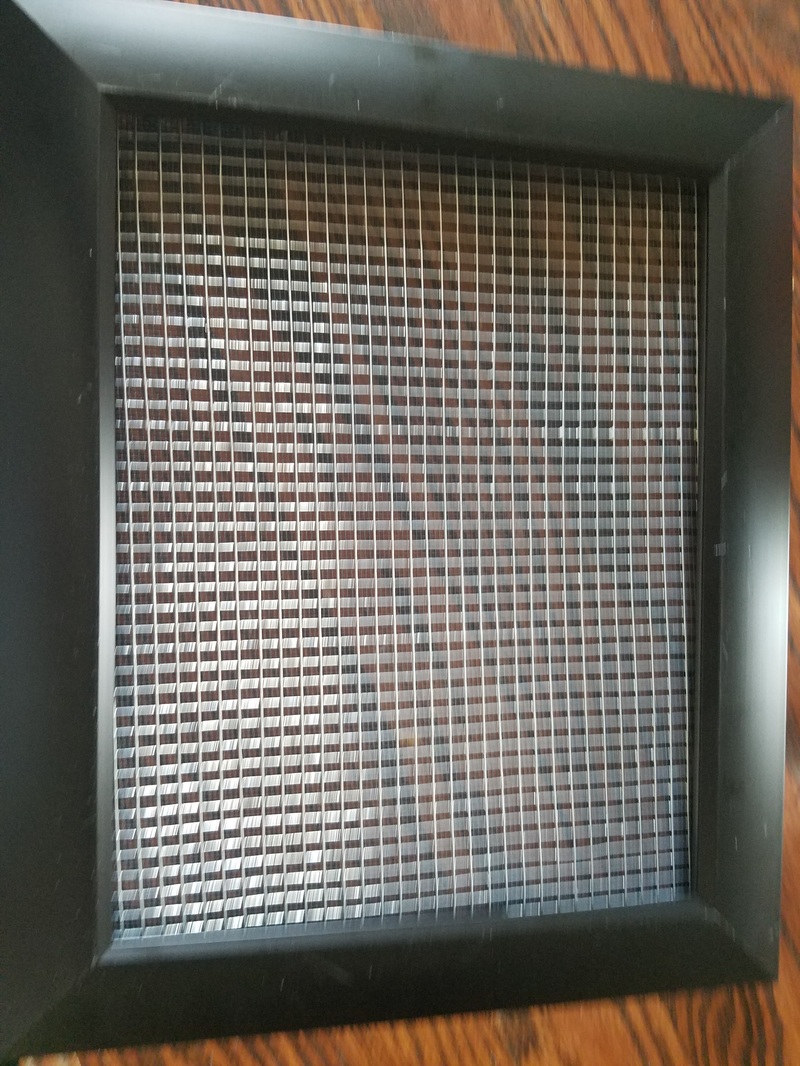
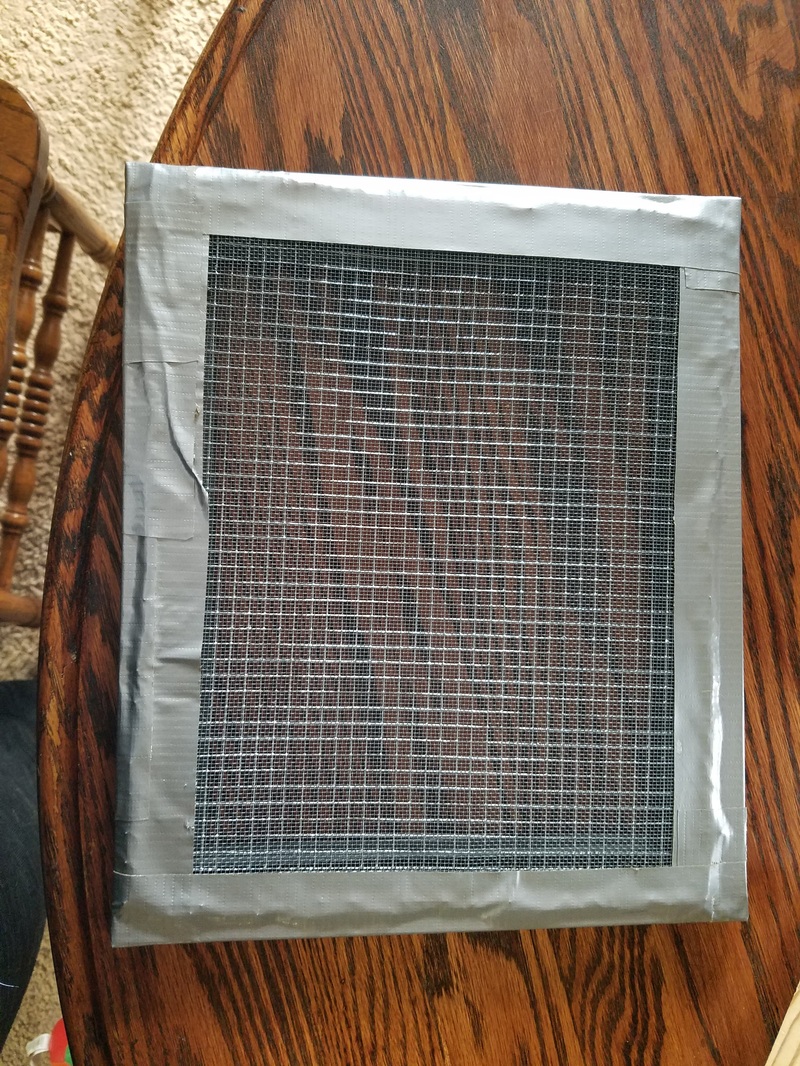
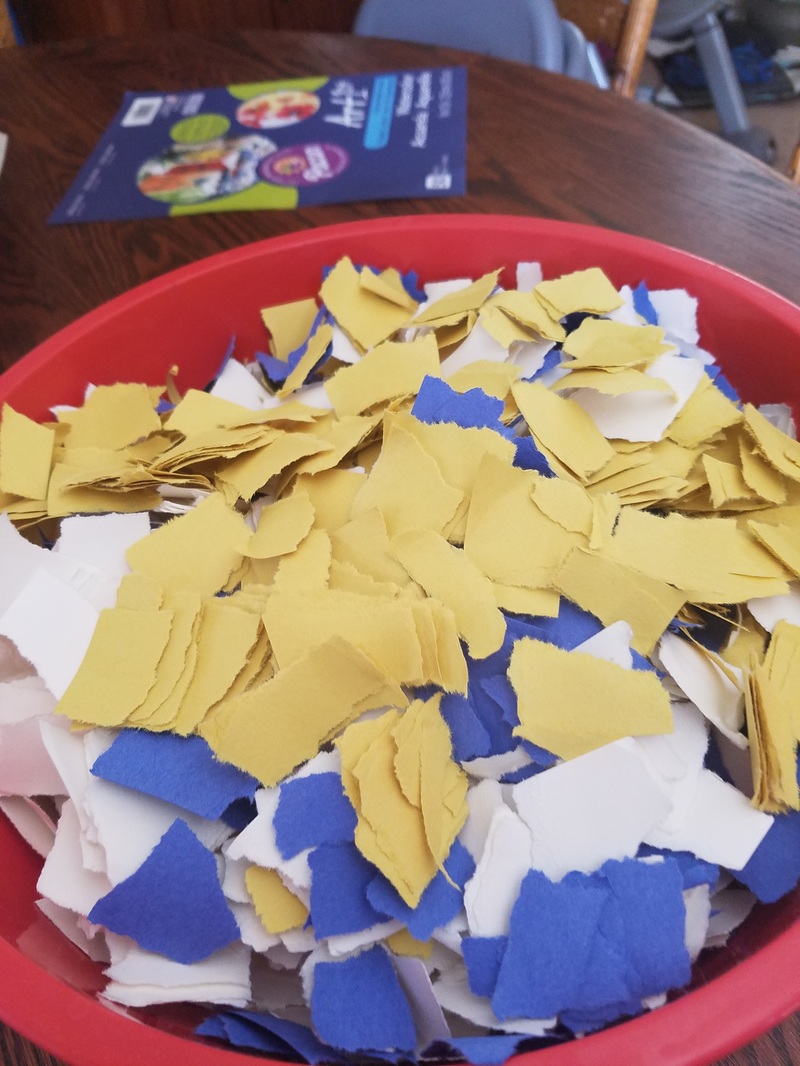
The Things I have Learned: 1. How expensive is this? - This cost about 20.00 because of the need for the cardboard, scrap booking paper, and gas needed to drive around town to figure out that nowhere sells wallpaper. 2. Are there enough online blogs and tutorials to cover my lack of knowledge? - The tutorial I used this week was called Coloresque by Caroline. 3. Are there different kinds/styles of book binding?- Yes, yes there is. Read Blog #1 to learn about some, go to my Pinterest board to learn more. Blog #2 I use the Box Stitch, Blog #3 I use the Hempleaf stitch. And, this week I went back to using the box stitch. 4. Is there a potential to hurt myself? - Yes, there was an X-ator knife (which again my husband did not let me use), a drill (which I did get to use), and the sewing needle (I only stabbed myself once) Blog #2 I burned my hand with the ribbon and Blog #3 I poked my hand about three times with the needle. 5. How quickly does book binding happen? - Blog #2 (the Box stitch and first attempt) took me about and two and half hours to make. Blog #3 took me about one and a half hours, because measuring and cutting paper takes time. This week took me about an hour. 6. Is there a "master" local book binder I can learn from? - I think I am going to stick with my online masters. If I happen to come across someone who knows more about book binding and can talk to me about I will defiantly have a LONG conversation with them, but I'm not going to go seek anyone out. 7. What am I going to create, a journal, a binding of my students work, a collection of poems that inspire me? - I am defiantly creating journals, and the first two are going to be Thank you gifts for my TA's and the last one will be a collection of poems from my students (who do inspire me). 8. Is this more difficult the bigger the book gets? - The actual stitching does not get more difficult, but it does take more material. One thing I am noticing that becomes more difficult is keeping the stitching tight. HOWEVER, with the hardcover, the larger book was easier to manipulate and it was easier to pull the thread tighter than in the paperback books when there was a fear of tearing the material. 9. How can I make larger holes, can I continue to use the binding awl, or will I need to use another tool? I needed to use the power drill to make the holes for this book, I am sure I will need it to make hole for my last book. I did need it, I probably wont go back to using an awl, I'll use the power drill. 10. How will I get a hole through a hard cover? - I'm not doing the hard cover until Blog #5, and I am 99% sure I will be using the drill. I did. I was useful. 11. Can I, should I, use a smaller gauge needle? - I did not need to change the gauge of my needle because I made larger holes and used smaller treading material. 12. How do I make a fold seam on a hard cover book? I have began researching this, and it is going to take some math :( The math wasn't so bad. It actually made sense to me, which is a great thing. 13. What is the best material to use when making my own paper? Anything really, from recycled paper, to dryer lint, to feathers. The best item that was mentioned was the produce flats that go in between the layers of fruit shipped to a grocery story. I couldn't get a hold of these in time, so I used my nephews old drawings. Answers to New Questions: 14. Where can I find wallpaper? Seriously, I have looked everywhere, where is the world hiding it? NOWHERE!!! It doesn't exist anymore. Ok, that's not entirely true. You can order it online, but it would have taken too long to get here for the purposes of this blog. 15. Next week I use an X-acto knife, any safety tips? Just hand that job over to the husband who has years of practice welding this apparently dangerous tool. Welp, that's it folks. I will do one more blog to wrap up my entire learning, but as for right now I wont be making another book... my students will be doing this though, and will I share a blog about that whole process. So, two more blogs I guess So, this week was the week I was suppose to make my own paper, and in my defense, I tired, I really did. But, despite my numerous tutorial videos and blogs, I was unable to get the slurry to hold shape long enough to move it to a drying mat. Regardless of my failed attempt I will post about what I attempted and succeeded doing. The materials that you need for this project are extensive, so I will break it down into steps. Step 1 - make a Mould and Deckle This is the frame that you will use to help give your paper the rectangular shape. You will need:
I think this turned out pretty well, though there were a few times that I injured myself because I was working with metal wires and tools. Nothing worse than a papercut, but I would suggest using the gloves and covering all the edges with duct tape.
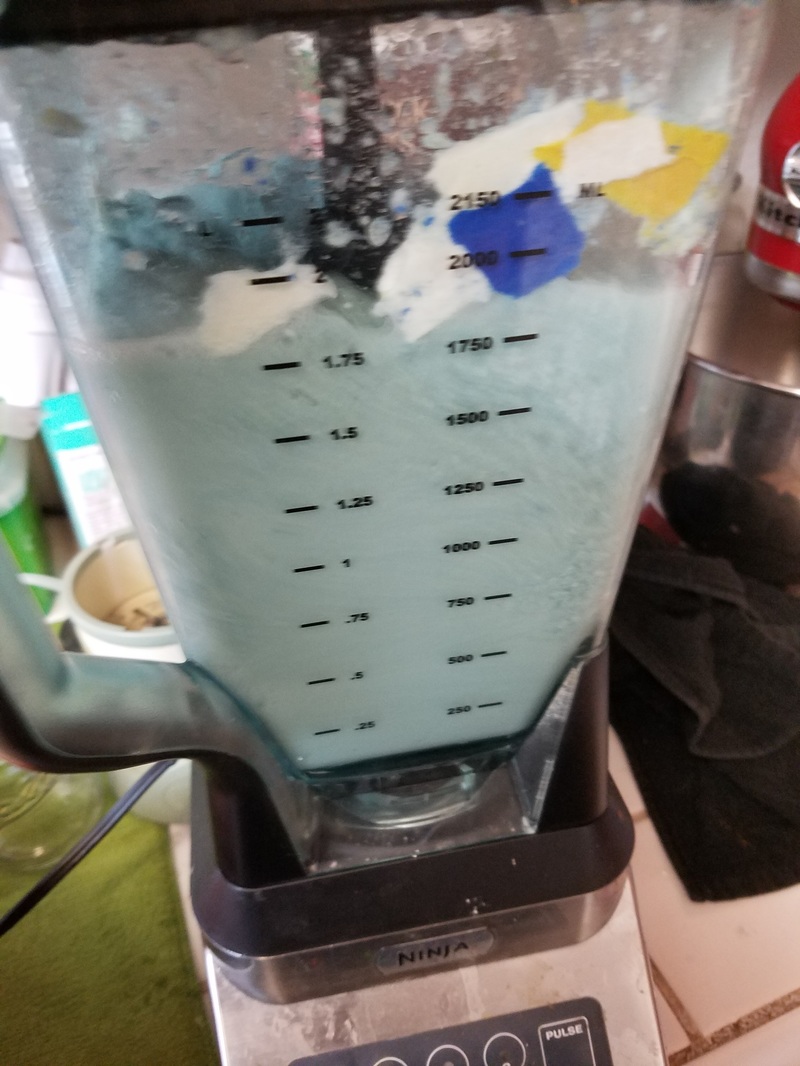
Step 2: Make a slurry This is the water and paper mixture that helps break down the material so that you can remold your own paper. You will need:
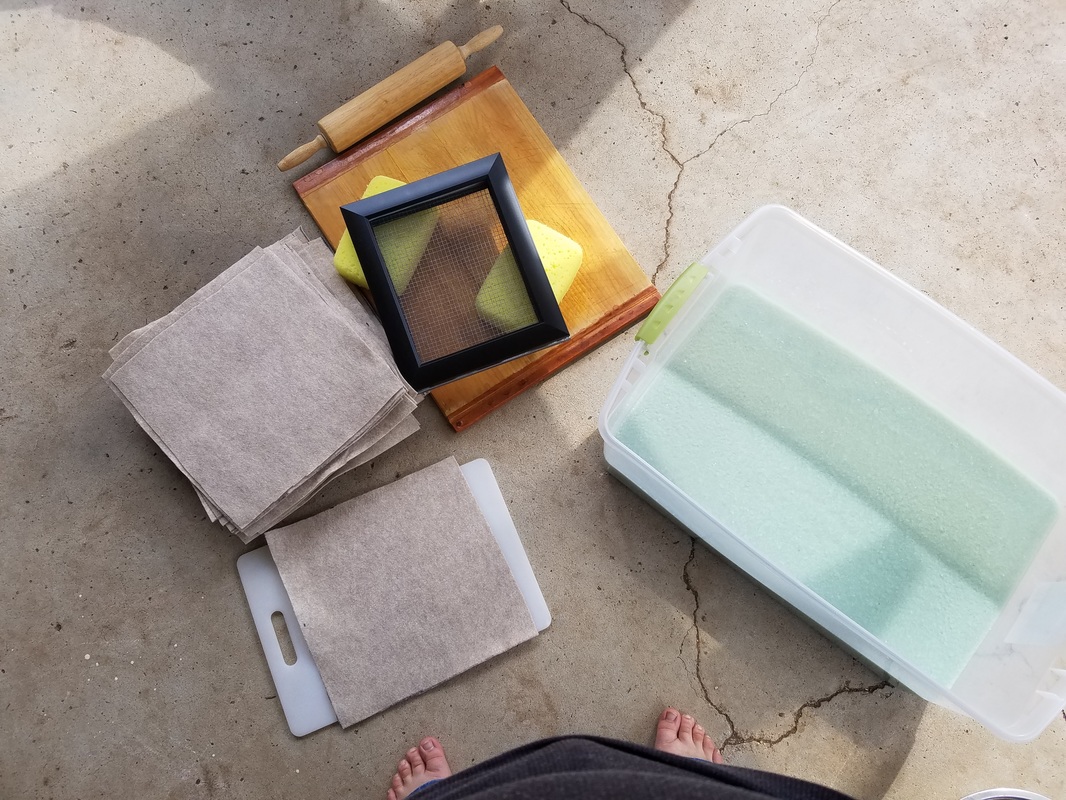 Step 3: Dipping paper (Also called couching) That's pronounced coo-ching. Then transfer the slurry to a vat (tub) that is bigger than your mould and deckle, so that dipping and drying is an easier process. You will need:
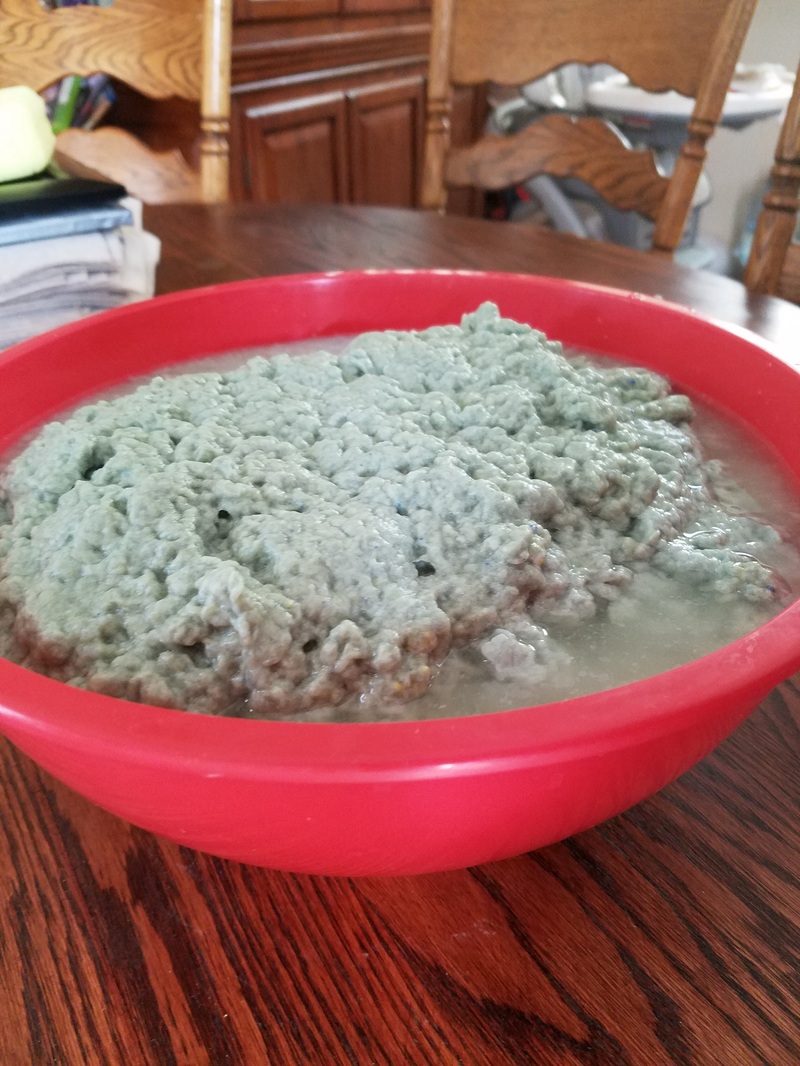
Begin by dipping the mould and deckle in the slurry. Pull it out of the mixture and shake it so that it shifts to fill the mould. Let this drip dry. Remove the deckle. Get the sponge and absorb some of the water, and carefully transfer the paper to a wool felt piece. Think of this as a door motion, rest the edge of the mould on the felt and tip it down onto the felt, then carefully lift one of the edges, leaving the paper behind on the felt. This was the part that I could not get right. I tried for about an hour, and every time the paper would fall apart. After the paper is on the felt, use the sponges and rolling pin to push out more water. Place another piece of wool felt over the paper, and repeat the process until you have a small stack. Place a board over the stack and stand on the paper to drain out even more water. Transfer the from the wool felt to a flat clean surface to dry. Depending on the humidity and exposure to the elements, this can take anywhere from 2 to 3 days to dry. The paper, from what I hear, will be wavy and wild giving it a very "homemade" look. You can make this paper from scraps of paper (I used my nephews old drawings), lint from the dryer, feathers, and even leaves and other organic material. If you are going to use leaves, you will need to make sure to starch the material so that it breaks down fast enough. I used tutorials from paperslurry.com and pioneerthinking.com. After having attempted to do this myself, I have to admit that these people are champions. The image below is of the final product in the paperslurry.com tutorial. 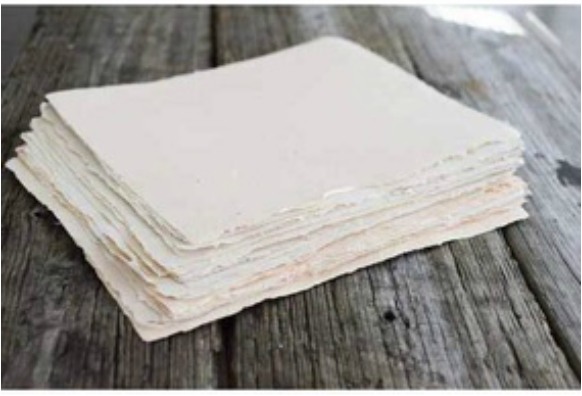 I am not giving up here with the paper, I will try again. But for the sake of this blog I need to move on. When I attempt this again, I will write an update blog.
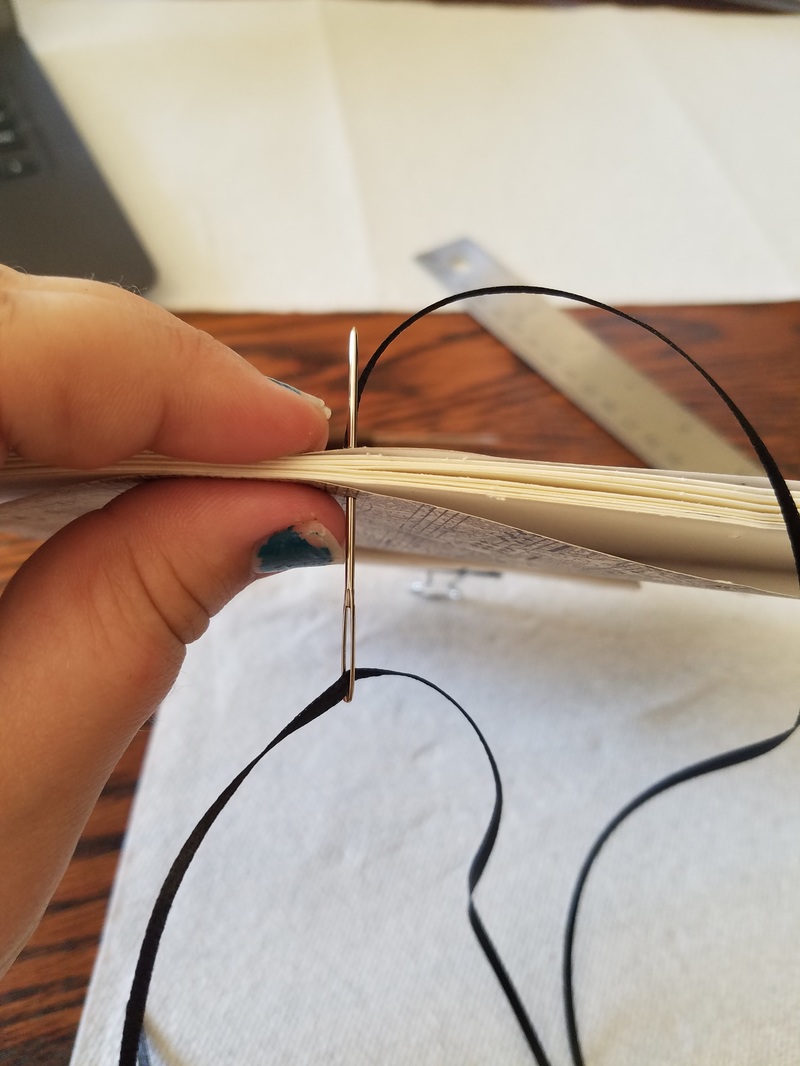
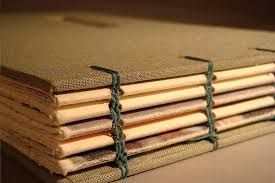
The Things I have Learned: 1. How expensive is this? - This cost about 50.00 because of the need for the hardware cloth, screening material, weatherstrip tape, frames, and wool. 2. Are there enough online blogs and tutorials to cover my lack of knowledge? - There were two, and they were helpful, however there was some major user error going on this week. 3. Are there different kinds/styles of book binding?- Yes, yes there is. Read Blog #1 to learn about some, go to my Pinterest board to learn more. Blog #2 I use the Box Stitch, Blog #3 I use the Hempleaf stitch. But, this week was about creating paper, not doing a book binding. 4. Is there a potential to hurt myself? - Yes, This time around were countless pokes from the hardware cloth, and that was just from putting duct tape on it. This is how accident prone I am, when my husband found out I was using wire cutters and hardware cloth he said he would be doing that part. We compromised, and I got to use the staple gun. Blog #2 I burned my hand with the ribbon and Blog #3 I poked my hand about three times with the needle. 5. How quickly does book binding happen? - Blog #2 (the Box stitch and first attempt) took me about and two and half hours to make. Blog #3 took me about one and a half hours, because measuring and cutting paper takes time. This week took me about 8 hours, until I surrender. 6. Is there a "master" local book binder I can learn from? - I think I am going to stick with my online masters. If I happen to come across someone who knows more about book binding and can talk to me about I will defiantly have a LONG conversation with them, but I'm not going to go seek anyone out. 7. What am I going to create, a journal, a binding of my students work, a collection of poems that inspire me? - I am defiantly creating journals, and the first two are going to be Thank you gifts for my TA's and the last one will be a collection of poems from my students (who do inspire me). 8. Is this more difficult the bigger the book gets? - The actual stitching does not get more difficult, but it does take more material. One thing I am noticing that becomes more difficult is keeping the stitching tight. 9. How can I make larger holes, can I continue to use the binding awl, or will I need to use another tool? I needed to use the power drill to make the holes for this book, I am sure I will need it to make hole for my last book. 10. How will I get a hole through a hard cover? - I'm not doing the hard cover until Blog #5, and I am 99% sure I will be using the drill. 11. Can I, should I, use a smaller gauge needle? - I did not need to change the gauge of my needle because I made larger holes and used smaller treading material. Answers to New Questions: 12. How do I make a fold seam on a hard cover book? I have began researching this, and it is going to take some math :( 13. What is the best material to use when making my own paper? Anything really, from recycled paper, to dryer lint, to feathers. The best item that was mentioned was the produce flats that go in between the layers of fruit shipped to a grocery story. I couldn't get a hold of these in time, so I used my nephews old drawings. New Questions: 14. Where can I find wallpaper? Seriously, I have looked everywhere, where is the world hiding it? 15. Next week I use an exacto knife, any safety tips? 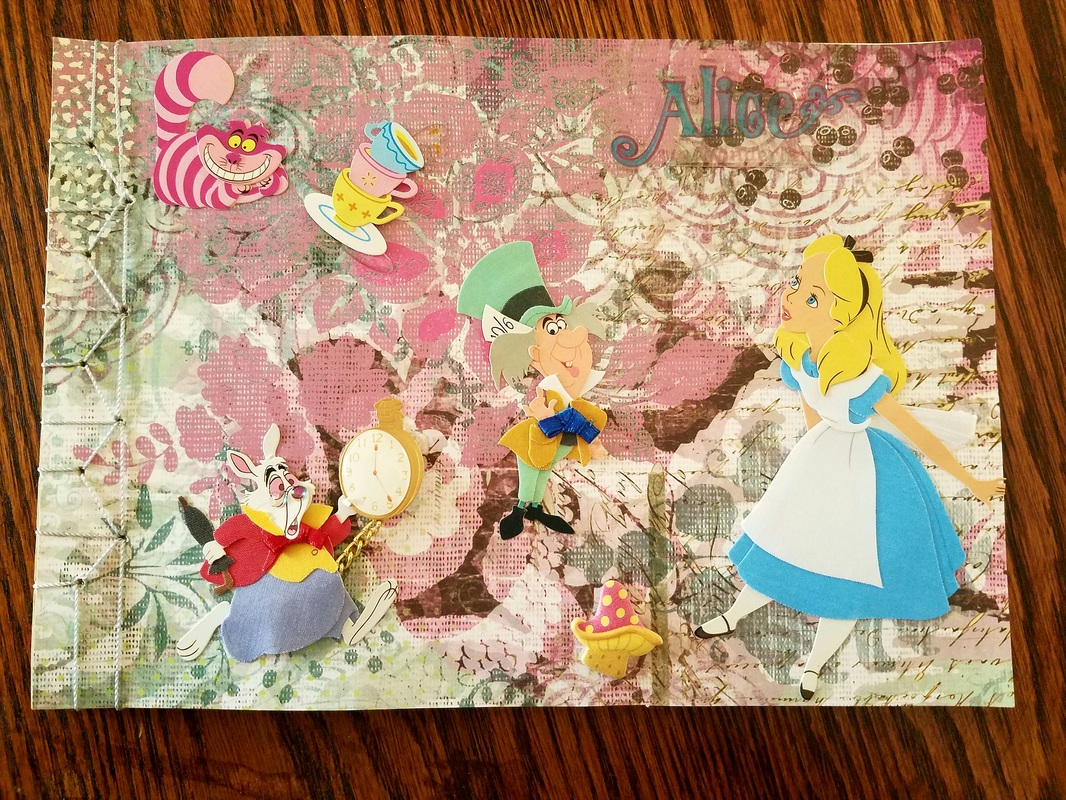 I thought this title was apropos for this blog, considering the next book I made was a Alice in Wonderland themed book. 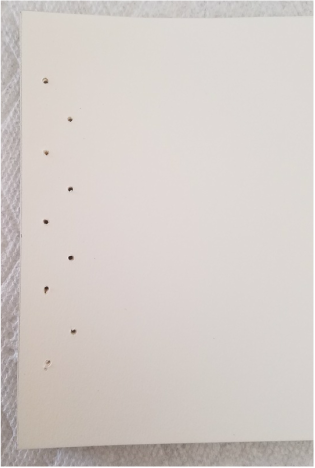 This week I used 16 sheets cut to 8 1/2 X 6. Last week I used 12 5X7 sheets, and it was difficult to get the needle and ribbon through the holes, so I broke out the power tools. I drilled nine holes, 5 were 3/8 of an inch from the seam of the book and 4 were 5/8 from the seam, alternating in a zigzag pattern as seen above. I made the holes with a 5/16 bit for the holes themselves. It's important that I make the holes bigger, and use a more sturdy tool than the binding awl. I also used a smaller threading material. This week I used a grey nylon twine rather than satin ribbon. This allowed me to pass through each hole without resorting to a painful and sightly humiliating form of calisthenics, which was so helpful for this week's stitching method, the Hempleaf (also called the Y stitch), because you pass through some holes five times, instead of three times with the box stitch. I used about 42 inches of twine for this project. Last week I used 25 inches. 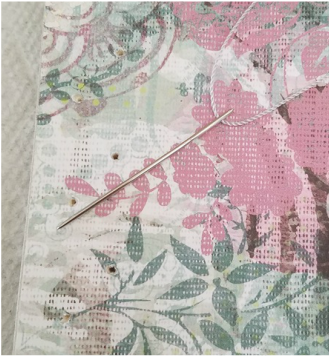 The 4 inside holes are going to be the "main" holes that you use, and the 5 outside holes will be used to create the Y shape. So, like with the box stitch, we start on the second hole from the bottom, half way through, starting from the bottom (see below left). Wrap back around to complete the first stitch, making sure to leave a tail of about 4 inches tucked into the book so that you can make your knot at the end (see below right). The steps for this kind of stitch in complex, and difficult to put into words, so, instead, I am providing you with the link to the diagram that I used to help me re-create this stitch. It comes from Amphian Photography, and I found it incredibly useful.
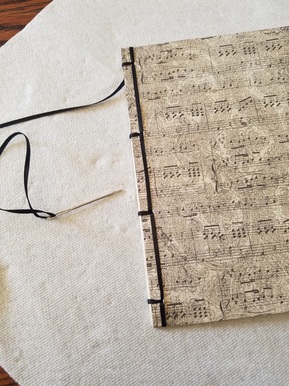
After all of the stitching is done the product looks like boxes with Y's put in the middle of them (see below). I then decorates with stickers and the book is ready to be gifted to my TA. I'll post about that next week, because for the next blog might not be very long. It will be about creating paper to use in my final project. I will be having my students write their own poems, using the paper I made, to record in this final book for all posterity. I'm really excited about it. 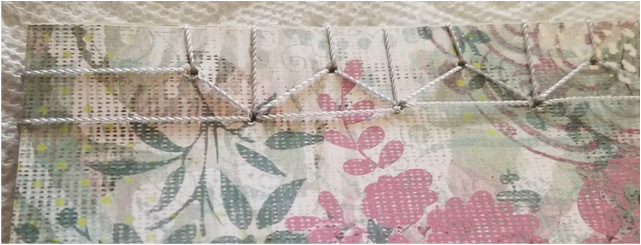 1. How expensive is this? - This stitch was not as expense to do as the other because I already had all of the tools I needed to make this book. It cost me about 10.00.
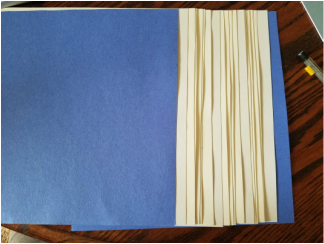
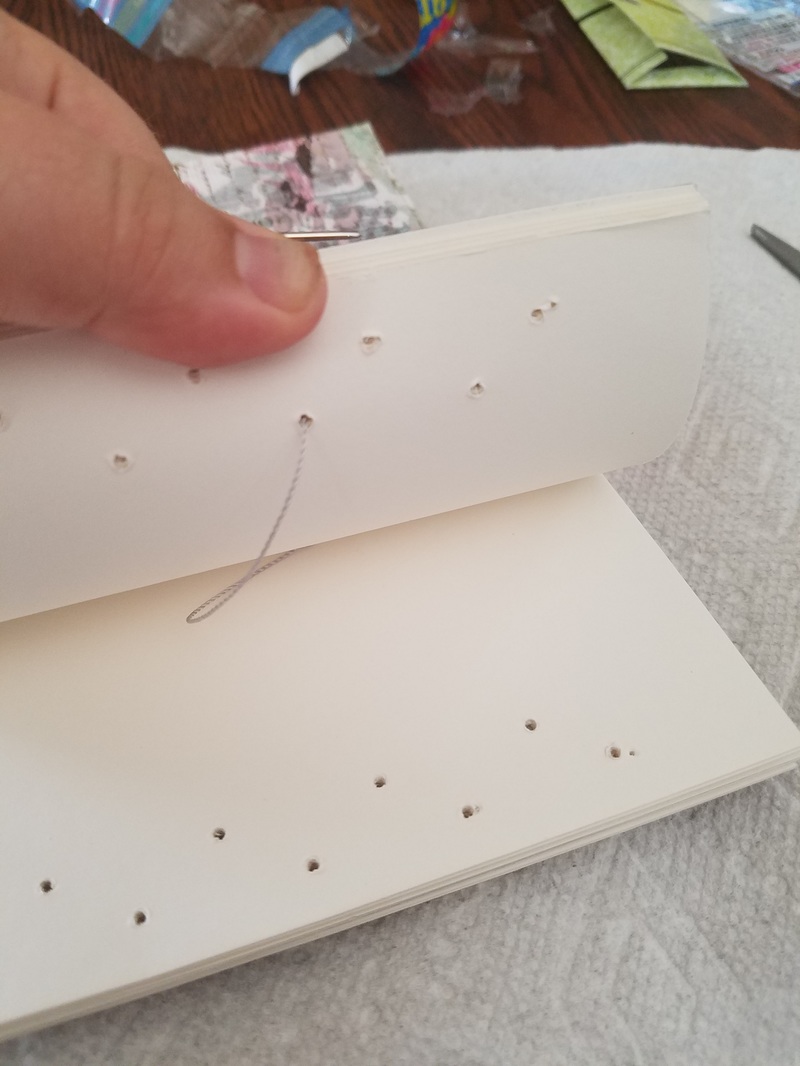
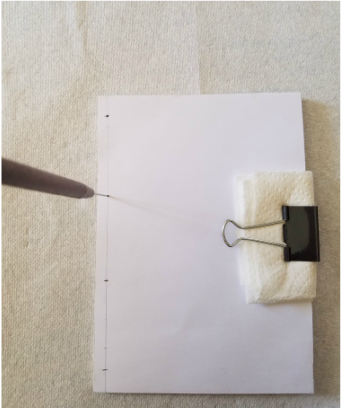
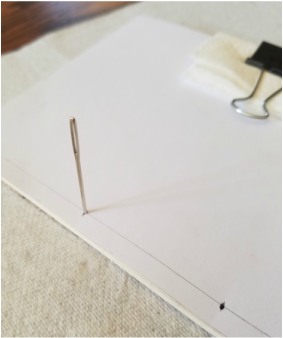
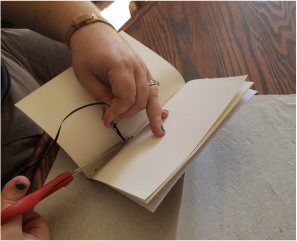
2. Are there enough online blogs and tutorials to cover my lack of knowledge? - Amphian Photography was useful this week. 3. Are there different kinds/styles of book binding? (see ... lack of knowledge) - Yes, yes there is. Read Blog #1 to learn about some, go to my Pinterest board to learn more. Blog #2 I use the Box Stitch, Blog #3 I use the Hempleaf stitch. 4. Is there a potential to hurt myself? - Yes, I am using a needle and a small shank. This is a possibility. Keep band aids handy. Blog #2 I burned my hand with the ribbon and Blog #3 I poked my hand about three times with the needle. 5. How quickly does book binding happen? - Blog #2 (the Box stitch and first attempt) took me about and two and half hours to make. This one took me about one and a half hours, because measuring and cutting paper takes time. 6. Is there a "master" local book binder I can learn from? - I think I am going to stick with my online masters. If I happen to come across someone who knows more about book binding and can talk to me about I will defiantly have a LONG conversation with them, but I'm not going to go seek anyone out. 7. What am I going to create, a journal, a binding of my students work, a collection of poems that inspire me? - I am defiantly creating journals, and the first two are going to be Thank you gifts for my TA's and the last one will be a collection of poems from my students (who do inspire me). 8. Is this more difficult the bigger the book gets? - The actual stitching does not get more difficult, but it does take more material. One thing I am noticing that becomes more difficult is keeping the stitching tight. Answers to last weeks New Questions: 8. How can I make larger holes, can I continue to use the binding awl, or will I need to use another tool? I needed to use the power drill to make the holes for this book, I am sure I will need it to make hole for my last book. 9. How will I get a hole through a hard cover? - I'm not doing the hard cover until Blog #5, and I am 99% sure I will be using the drill. 10. Can I, should I, use a smaller gauge needle? - I did not need to change the gauge of my needle because I made larger holes and used smaller treading material. New Questions: 11. How do I make a fold seam on a hard cover book? 12. What is the best material to use when making my own paper? 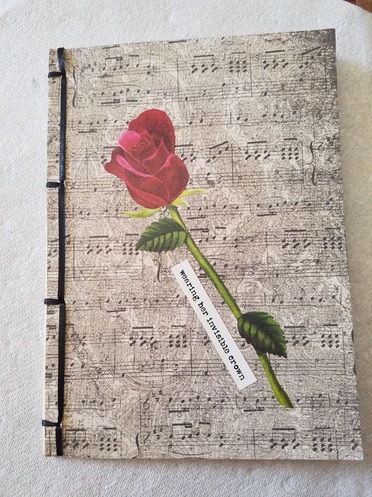 So, I have to say, that while I knew that this was going to require a lot of sewing (a task I have not willingly participated in since Middle School Home Economics) I did not expect the actually action of sewing to be so difficult. If there is one lesson I learned in the creation of this journal is that I need to either make the holes bigger or the threading material thinner. The reason for this is that you pass though each hole three times. This made for highly comedic moments where I was coaxing the needle though, speaking to it like it was a shy animal. So these were the materials that I used for this project. 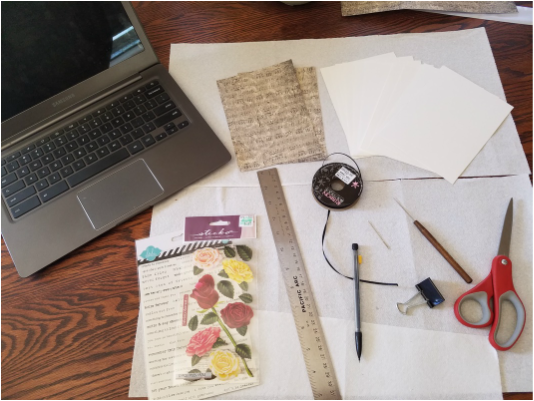 2 5X7 cover pages (scrap booking paper cut down to size) 10 5X7 filler pages (regular construction paper cut down to size) 1 metal ruler 1/8 inch black satin ribbon 1 13 gauge needle 1 binding awl 1 binder clip Pencil Sissors Paper towel Computer for back up research Stickers for decorating the front cover I started with measuring the paper, and cutting it out, here's my rough draft. 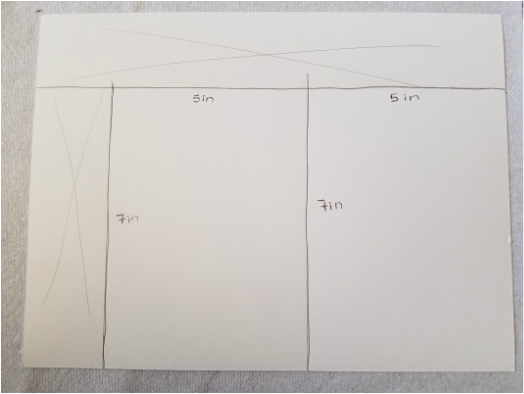 I turned the covers inside out, so I could do some measuring and marking with pencil. I am measuring out the locations of the sewing stations, this is just the fancy way of saying the holes for sewing. I measured 1/4 inch in from the seam (you need at least 1/8 of an inch, but I wanted the binding to be highly visible) and placed stations 1 and 4 1/2 inch from the head and the tail of the book respectively. Hopefully, a picture will help. 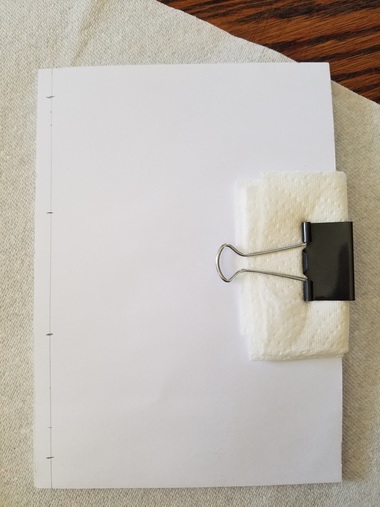 If you'll notice, I have also bound the pages together using the binder clip and a paper towel, this is so that the papers wont become dented from the pressure of the binder clip. Then I grab the binding awl (which, let's be honest here, is the tool that will most likely cause me injury) and begin stabbing the four holes that the four sewing stations. I noticed that the holes seems a little small, so I grabbed by needle and pushed that through the holes a couple of times to expand it more. Little did I know, I needed to make those holes even bigger.
Then I measured out my ribbon. The length of ribbon that I cut was 5 times the length of my book. In Japanese stab binding it is OK to have extra thread, because you'll just cut it off at the end. 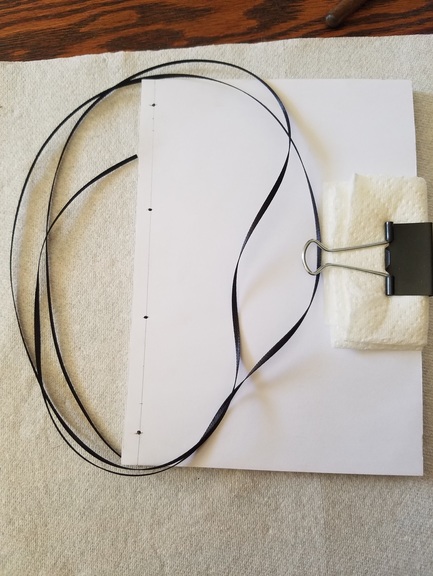 I decided not the have a knot a the end of my ribbon to hold it on the needle because that would add to the width of the material that I had to pull through the hole. You begin sewing on the second station, from the middle ,moving your needle upwards (picture on the left). Leave about 4 inches not pulled through, and tuck it into the book facing away from the seam. We will come back to this "tail" when we are ready to tie the knot. Then wrap the ribbon around the seam and go back through the whole hole to create the seam stitch (picture on the right).
Then move to station three and push your needle from top to bottom, going back through the hole to create the second seam stitch. 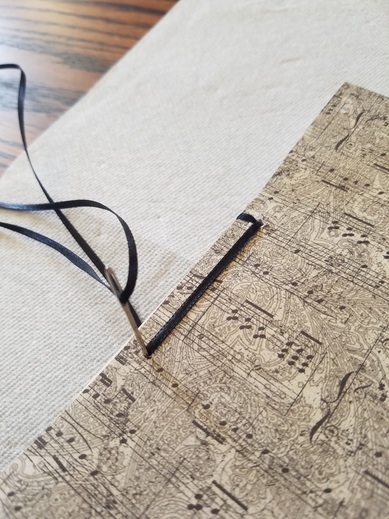 Repeat this process for the fourth station, looping through to create the seam stitch, and then a second time to create the corner stitch. 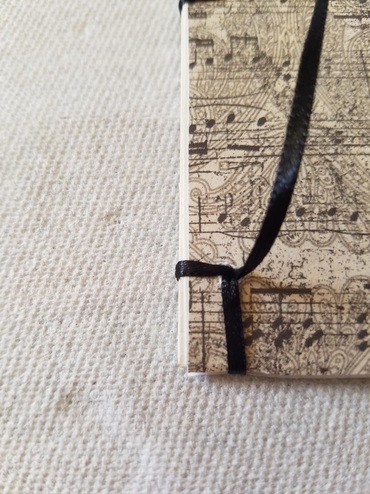 At this point you should have black ribbon on alternating sides of the book, making to look like the ribbon is weaving through the holes. Now it when you go back through all the holes, weaving as appropriate, to go back to station one. Format station one so that it is a reflection of station four, corner stitch and all. (left picture) The only un-stitched portion should be the back of station 2. (picture right)
Here's the tricky part, you need to go back through station 2, but only stitch half way though, meeting back up with the 4 inch tail you left at the beginning. (top picture). Make two knots to tie off the ends, (bottom left) cut the ends so that they aren't hanging out of the book (bottom right) and there you have a book. 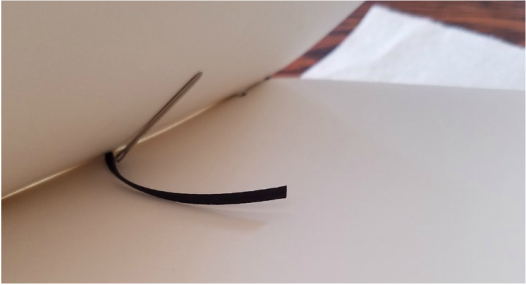
Are you as confused as I was with all the sewing steps? Don't worry I used a tutorial video to help me better grasp the different steps. This particular one is called "Japanese Book Binding Tutorial: 4 hole" by Sea Lemon. The link to the video is in the uploader's name. Some thing's I learned/questions I now have: 1) Make larger holes, or use smaller threading material. 2) How will I get a hole through a hard cover book? 3) Could I use a smaller gauge needle? There has also been one revision to my plan, instead of doing a different binding technique next week, I am going to attempt to do this same binding with a hard cover. As I wrap up this post, here are some of the questions I have answered so far, and revised answers for the one's I have already answered.
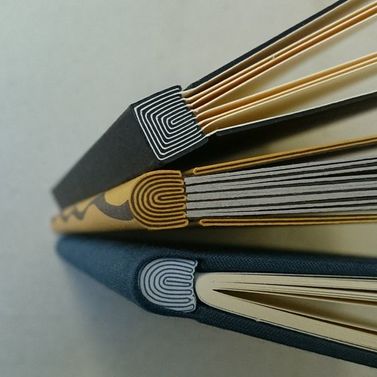
1. How expensive is this? - This particular project set me back $22.53, i misjudged the cost of scrap booking paper, and binding awls were hard to find. 2. Are there enough online blogs and tutorials to cover my lack of knowledge? - Sea Lemon was a particular lifesaver this week. 3. Is there a potential to hurt myself? - Yes, though I did not hurt myself with the binding awl like I thought I would, instead I hurt myself with the ribbon. I gave my hand a burn while pulling it through. Ribbon burn is a thing, I guess. 4. How quickly does book binding happen? - This book took me two and a half hours to o, that's not including shopping and research time. 5. Is there a "master" local book binder I can learn from? - Does an online "master" count? I think so. 6. What am I going to create, a journal, a binding of my students work, a collection of poems that inspire me? - I plan to give this journal to a friend of mine who loves to write poems. 7. Is this more difficult the bigger the book gets? - I don't know this yet, since each practice book will get bigger, I will find this out as I go. New Questions: 8. How can I make larger holes, can I continue to use the binding awl, or will I need to use another tool? 9. How will I get a hole through a hard cover? 10. Can I, should I, use a smaller gauge needle? 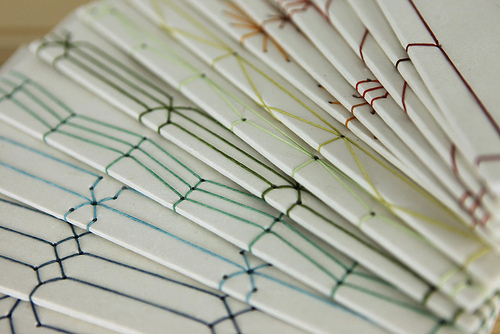 So, I fell down a rabbit's hole, and I don't regret it one bit, I would go back if I could, but alas, I don't have time, and the posts must go on! So, this is what I have found. There is a TON! of different kinds of binding I can do. The simplest seems to be the hole punch method (also called stab binding), Amy Robinson at http://amyrobison.com/ had a great tutorial about this method. It seems fairly easy to do, something I could teach my students. However, I am looking for a challenge for myself, so I kept looking. (P.S. the link will take you to her tutorial, it really is wonderful) The second most difficult (and highly versatile in regards to pattern) is the Japanese style, which follows the hole punch method shown above, but the stitching is much more intricate, to say the least. Take a look at the header photo from Erin Zam from flikr I found it on Ruth Bleakley's blog, but Erin has a blog of her own as well. Both of these tutorials could come in very handy if I should decide to do this style. The Onion Skin binding, which is the beginning of the gluing methods, is not terrible difficult BUT it does require a lot of cutting and math and precision, three things I am not very good at. Though this binding method is fun to look at, and maybe one day I'll get to do this. (Look at the LEFT picture for a reference, the picture comes from Benjamin Elbel) The next method I looked at was the coptic stitch binding method, and in my opinion this is as advanced as it gets. I mean you have to get a binding jig (bottom picture take from SF Books Craftsman) this is a beautiful method, and very secure and "official" looking. However, I do not have the means to make the necessary equipment yet. Big "yet" because I want to do this eventually. Just not yet. (look at the RIGHT picturefor a reference, the picture comes from the Tate Guide Collection)
 So there are a lot of different options, including piano hinge and structure hinge, but there is not a lot of time for that. So this is what I have decided to do for the remainder of the blogs... I am going to attempt two different styles of Japanese stab binding. Next week, which is Blog #2, will be a "practice" book where I attempt the basic Japanese stab binding (picture at the end comes from Brigitte Schuster blog). Blog #3 will also be a "practice" book, but with a more difficult stitching method, I have not decided on which one yet, so that will remain a mystery. Blog #4 will take a slight detour into the land of paper making, because I found some research about that, got really jazzed, and now I'm doing it, as if I didn't have enough to do already. Oh Well. The paper that I make in Blog #4 will be used in Blog #5 when I make a final book and decide which of the two stitch methods is my favorite. As I wrap up this post, here are some of the questions I have answered so far. 1. How expensive is this? - Depends on what kind of binding you are wanting to do and what equipment you already have. For the Japanese Stab Binding that I am doing, I will be spending about 17.00 - 20.00 dollars depending on the kind of paper and thread I get. 2. Are there enough online blogs and tutorials to cover my lack of knowledge? - There is a TON of information in the form of blogs, tutorials, videos, and images that I can learn from online. 3. Are there different kinds/styles of book binding? (see ... lack of knowledge) - Yes, yes there is. Read the post above to learn some, go to my Pinterest board to learn more. 4. Is there a potential to hurt myself? - Yes, I am using a needle and a small shank. This is a possibility. Keep band aids handy. 5. How quickly does book binding happen? - For the first time? I don't know yet, I'll find out soon. 6. Is there a "master" local book binder I can learn from? - Don't know yet. 7. What am I going to create, a journal, a binding of my students work, a collection of poems that inspire me? - I have some ideas, but I'm not settled yet. 8. Is this more difficult the bigger the book gets? - I don't know this yet, since each practice book will get bigger, I will find this out as I go. 9. How expensive is nice leather for a cover material? - I've decided not to do leather, because good leather runs $55-$200, and bad leather falls apart too quickly to be "useful" 10. Is leather an acceptable cover material or is there something better? - there are a lot of better materials out there like fabric, paper, and cardboard. Wish me luck. 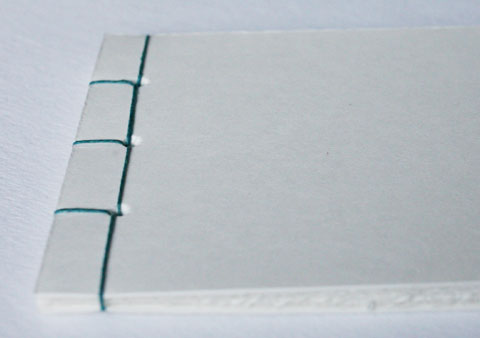 It is important that this project incorporates five concepts: opportunity for failure, includes aspects of prior knowledge, play, can be useful for future use, and making a final product.
I have decided to do book binding. It has always been an interest of mine to be able to take my poetry and and other writings, and put them all together in a book (final product). I feel that this would be a craft I can learn and then recreate every year as a teacher so that I have a memento of the students that I have had (future use). I enjoy being able to use my hands and my mind, as well as being able to incorporate aspects of my writing into what I am making (play). I already know the basics of sewing, and from what I imagine will happen, this knowledge will be useful, and I have also formatted books on Word (prior knowledge). I am very much aware that this project may end in total disaster. I often imagine something greater in my head, and strive to achieve it, but when what I create falls flat when compared to my expectations, I often become discouraged and feel defeated. My goals will have to include a desire to maintain a positive outlook (opportunity of failure).
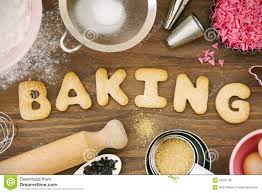
There are two ideas that are mulling around in my mind as to what I would like my 20% project to be. The first is book binding, because I love books, and the idea of being able to bind a book is utterly awesome. The second idea is to become a "better" baker. I put better in quotation marks, because, as it stands right now, I am an awesome baker. If I have a recipe. From the back of a box. And my mom standing there reminding me of every little step. And also there to pull the delicious treat out after I have forgotten about it and before it burns. There are a few questions I have before I decide on what I should do.
|